Home > Halloween Photo Tips
Ten Tricks for Haunting Halloween Photos
When it comes to photo opportunities, Halloween is epic! Of course, this fun and frightful holiday poses some photographic challenges, like darkness, fast-moving trick-or-treaters, and busy, hectic settings like spooky parties and bustling sidewalks. With that in mind, we've pulled together our top ten tips for scary good photos. You know, the kind of creepy and cute shots that you'll want to share in a Halloween collage, slideshow or greeting.
1. Let Little Ones Loom Large
Photograph children from below to give them an imposing stature befitting their costume. Shooting from adult height can result in photos that don't do justice to little ones--especially those inhabiting the role of Superman or regal princess! Try interacting with them as if they are their character. Ask your mermaid about her underwater adventures, and capture her expressions as she responds.
 2. Try Technical Trickery
For better low-light shots, increase your ISO if possible. This adjustment boosts your camera's sensitivity to light and therefore its speed. Sometimes a bit of graininess results from this strategy, but fear not, as it can lend an old-timey, Halloween-esque feel! Even a little blur from movement can give a ghostly look that works for Halloween. However, if you really want to minimize blur, use a tripod or even a fence post for steady shooting.
3. Shoot at Twilight
Twilight is a bewitching hour for taking eerie photographs that scream “Halloween!” As a general rule of thumb, your photos will appear darker than they actually are. The rich, deep color in the sky at twilight will translate as nighttime, but with enough light for fabulous shots.
4. Let Lighting Lurk Below
A sinister effect can be achieved with a simple flashlight, and it's pitch-perfect for Halloween. Just have your subject hold a flashlight a few inches below their chin, and let it illuminate their face while casting shadows over their scary (or perhaps scared?) expression.
 5. Explore Devilish Details
An amazing costume is created with attention to detail--and so are great Halloween photos! When a point of interest catches your eye, let it be your focus and fill the frame with the sparkle of Dorothy's shoes or the impressive face make-up on the zombie. Be sure to photograph the back of the costumes as well, to show the swirls in your fairy's wings or the swish of a superhero's cape. Pick a frightful focus for best results, as head-to-toe photographs are often thrown off by shoes. Footwear is usually not well-integrated into costumes and can distract from the Halloween spirit.
6. Hit the Jack-o-Lantern Jackpot
After carefully carving artful gourds, you'll want to capture how fantastic they look. But how? Shoot without flash or other additional lighting, and you'll only see the lit-up cut-outs, and not the form of the pumpkin. Use typical, full-on flash and the glow is lost while an unforgiving sheen on the jack-o-lantern's surface takes away the magic. The trick is to use more than just one or two candles in your jack-o-lantern to amp up its presence. Then set candles around it for your shoot. Place candles behind your gourd for a silhouetted shot. Place them in front and around to show more detail, but still with the Halloween aura you're after.
 7. Bring Guys and Ghouls Together
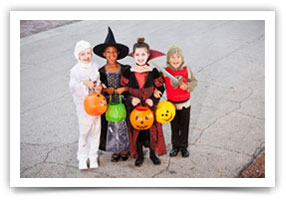
For group shots, get witches and knights to cozy up! They should be touching each other--which will probably require you to request (more than once) that everyone move in. To prevent the group from looking disconnected and adrift in your photos, even arch enemies like Batman and the Joker will have to get close.
8. Put a Damper on Frightening Flash
In general, to avoid harsh lighting, use flash sparingly even in dark Halloween settings. But if you're willing to get a little tricky, you can make use of it when necessary. A colored filter can be made by taping red or orange cellophane over your flash, and the effect can be spookily spectacular. You can also try covering the flash with your finger to block some light while letting enough through to brighten up your subject just a bit.
 9. Find a Spooky Scene
Whether attending Halloween parties or out roaming the neighborhood, take advantage of decked out homes--your own or your neighbors'. A front door is the gateway to goodies, and decorated and in a color that catches your eye, an excellent backdrop. Just try not to let a too-crowded background distract from the star of your photo. Sometimes simple is best, like a woodsy setting or even the side of a weathered garage. Keep your eyes open and be creative!
10. Tap the Wizardry of iPhone Apps
Remember that you can elevate Halloween snapshots after the fact with help from haunting iPhone apps. Change the mood with filters, liven it up with animation, or add a spooky frame and captions with our own free, fun app: Smilebox for iPhone.
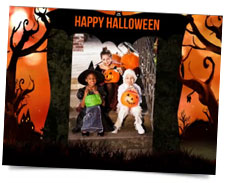
Let Your Photos Shine
Capture those delightful Halloween moments in one of these featured Smilebox designs.
Halloween Chevron Collage
Share costume and party photos in a Halloween collage with chic chevron and your pick of googly-eyed critters.
![]()
Get this design
Gone Batty Slideshow
This animated slideshow delivers spooky with a side of silly, thanks to some playful bats.
Get this design
What is Smilebox?
Our simple application for PC or Mac lets you quickly and easily create slideshows, invitations, greetings, collages, scrapbooks and photo albums right on your computer. To get started, download and install the Smilebox application. Then simply select the photos you want to use, choose a template, add comments and music and voila, you’ve made a Smilebox! With more than 1,000 customizable templates to choose from, you’ll find inspiration around every corner.
![]()
Share this article:

Also check out our Halloween party tips and free printables, Halloween Birthday Invitations and Fall Photo Tips.